Categories
Vegetable Gardening

How to Grow Lettuce Leaves in a Container?

Introduction

Today, I am going to share my experience of how to grow lettuce in a container placed anywhere in your kitchen or vegetable garden. Lettuce is a kind of vegetable that can be grown all-round the year in any climatic conditions. On top of it, its nutritious value is high and is best suited food ingredient for people who are on a diet. Low in saturated fats and sodium, lettuce is rich in;

  • Thiamin
  • Iron
  • Vitamin B6
  • Potassium

In addition to this, it is a good supplier of;

  • Dietary Fiber
  • Folate
  • Manganese
  • Vitamin A
  • Vitamin C
  • Vitamin K

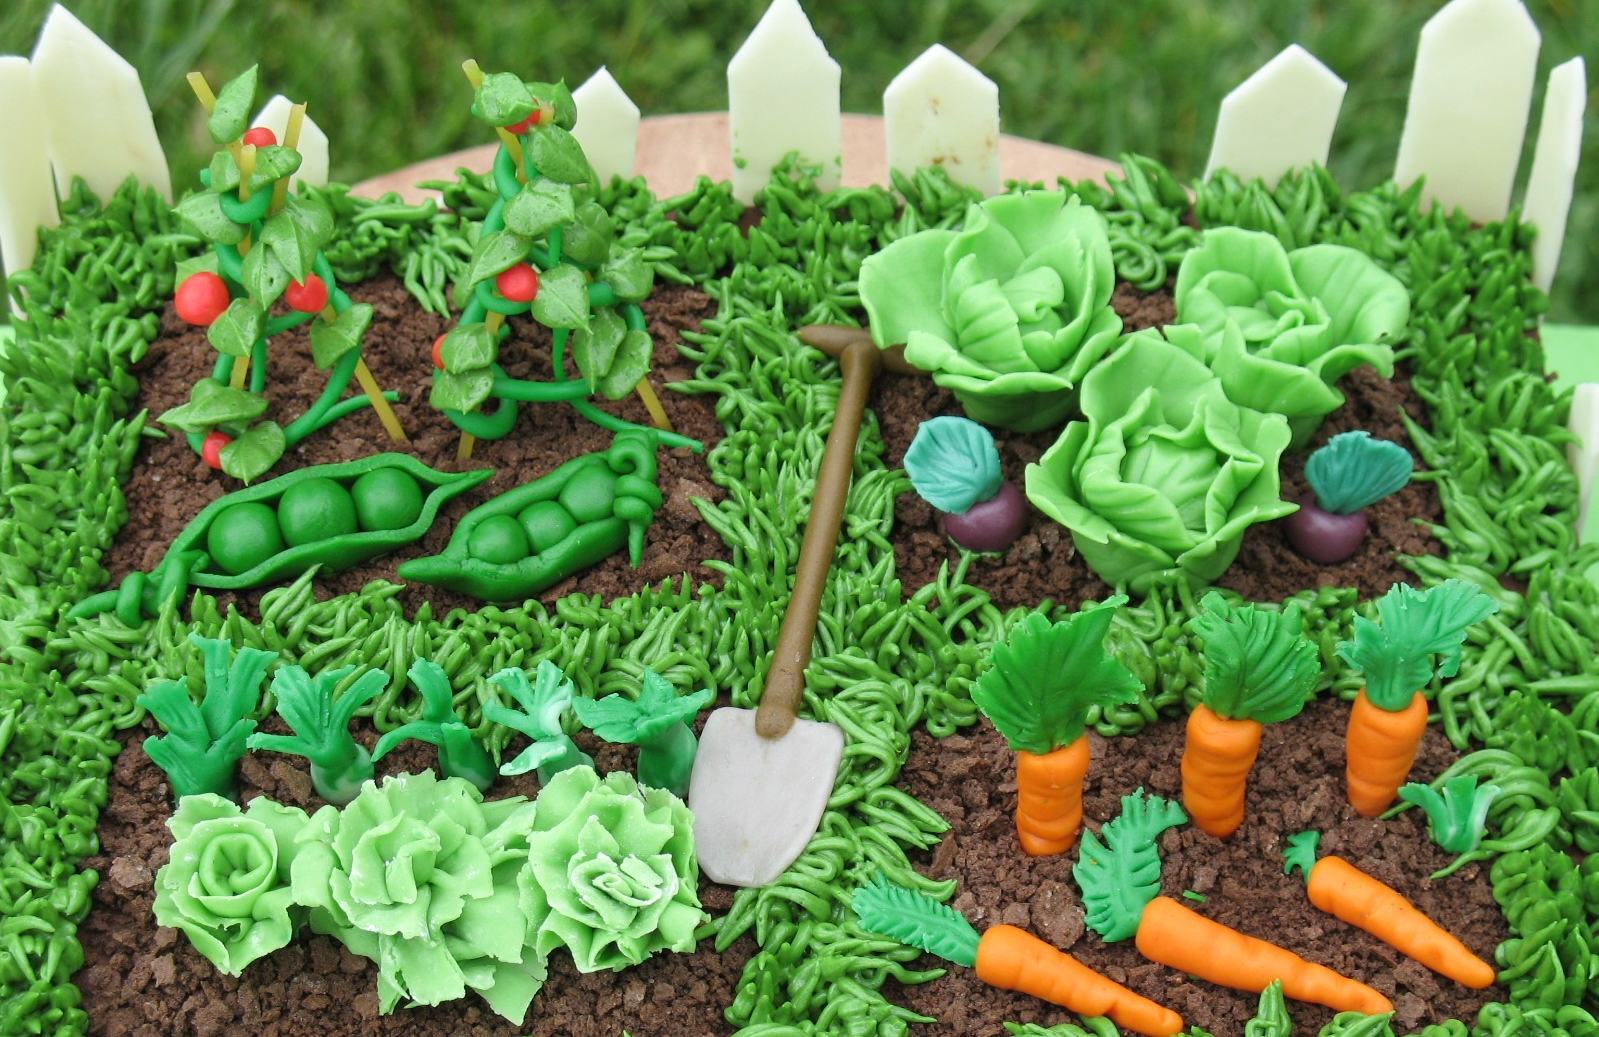
Vegetable Gardening for Beginners: a Complete Guide

Lettuce in Urban Gardening Containers

Urban gardening is gaining popularity these days as it can add a joyous activity in your daily busy and hectic life. On the other hand, it also adds fresh and juicy vegetables for your meals and a healthy life style.

Lettuce

Salads are a vital part of our food, offering lots of valuable vitamins with least calories, thus ideal food for diet conscious people. For this purpose, lettuce are easy to grow in container of your vegetable garden that will return you with multiple harvests. Growing lettuce in kitchen garden can be an amazing experience for the beginners.

Below lines will guide you with the steps of how to grow lettuce in a container of your kitchen garden.

What do you Need?

Lettuce plant allows you multiple harvests, i.e. as you collect the leaves, new ones grow in place of older. For this reason, it is very important to have;

  • Proper quality potting soil
  • Good quality seeds.
  • Right size container

Recommended Container & Potting Soil for Growing Lettuce

Soil: First step in how to grow lettuce is the selection of proper soil. Good quality potting soil is available in the near nursery store while many online stores also offer potting soils for lettuce. Just be sure that potting soil for lettuce should have a mix of soil, peat or compost and vermiculite or perlite. This soil mix allows good water retention that is best suited for lettuce in containers.

Seeds: There are various varieties available for growing lettuce in a container. In fact when you search for a variety of lettuce, you will be amazed that there are endless varieties of lettuce available. My recommendation is to select the variety you like the most. This is because, different varieties taste differently. Among many, you can chose;

  • Crisphead
  • Butterhead
  • Lose leaf
  • Summer Crisp
  • Little Gem
Lettuce Varieties for Container Farming

What I have grown in container of my vegetable garden is Little Gem variety. This variety was originated in France. You will find this variety crunchy, sweet in taste with miniature heads of lettuce that are full of nooks and crannies.  Little Gem variety of lettuce is best for salad dressing and can be cooked for food.

Container: The container should have an appropriate size with drainage holes. My container size is 12 inch and it has already given me 3 harvests and still lettuce plants are performing well. The container should have appropriate size because as the lettuce plant grows the root system also expands.

Growing Lettuce in a Container

Sowing the Lettuce

Now you have reached the most important phase of growing lettuce in container. Choose the place that has good access to sunlight. Lettuce loves sunlight. Its large green leaves love to do photosynthesis a lot. So it is highly recommended to move the container into a brighter space with at least 8 hours sunlight access.

Now moving to the sowing phase, fill your container with potting soil up to an inch or even two centimeters below the rim. For direct sowing, place the seed 1/4 to 1/2 half inch deep and then cover with soil. The soil should be moistened.

It is recommended to sow your seeds 4 to 6 inches apart. on the contrary, I have sown my Little Gem lettuce seeds 3 inch apart and I am getting good produce of lettuce in container. However, if you are planning to cultivate Lose Leaf variety of lettuce, 4-6 inch distance is a must. Remember that the seedbed of your lettuce in container never dry out.

Sowing Lettuce Seeds

Caring the Growing Lettuce in Container

Now you have passed the important steps of growing lettuce in a container. Wait for germination. Usually it takes 5 to 10 days for germinating. Your newly born tiny lettuce plants need your care. Following are few points that should be taken care of while growing lettuce in a container.

  • Never add synthetic fertilizer to your lettuce in container of urban garden. The objective of having fresh and organic vegetable garden grown lettuce will die at the moment you add a pinch of fertilizer. So avoid it. The potting soil is already rich in nutrients.
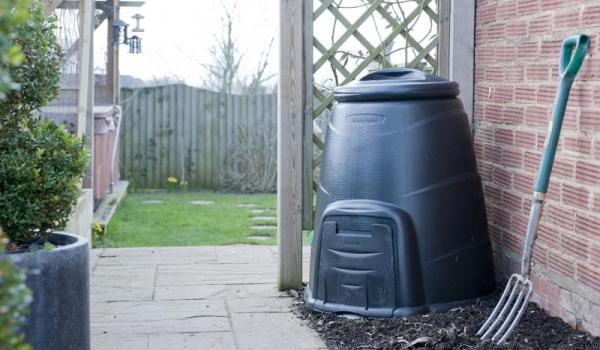
  • Add compost ‘if’ needed.

Prepare Your Compost at Home. How? Here is my DIY Article on Making Compost at Home

  • If temperature is around your kitchen garden is more than 30oC, move your container to a shady place. This is the biggest advantage of growing lettuce in a container to customize it in any manner you need.
  • Avoid drying of soil in your lettuce container.

Believe me, the result of all the previous steps and caring you will add to the growing lettuce in container will result in lush green and healthy lettuce leaves. They will be ready to cut right after six weeks after sowing. You can harvest them with a sharp knife but try to harvest little, just the amount you needed.

Germinating Lettuce

 Hey Guys, don’t forget to like and share this post below. It will be a boost-up for me.

Happy Growing and Eating 🙂

Cite this Article in APA Style as:

[box type=”note” align=”aligncenter” ]Rahman, M. A. (2017, September 16). How to Grow Lettuce Leaves In a Container? [Blog Post]. Retrieved from http://aridagriculture.com/2017/09/16/how-to-grow-lettuce-leaves-in-a-container[/box]

Save

Save

Save

Save

Save

Save

Save

Save

Save

Save

Categories
Vegetable Gardening

Post-Storm Irma Tips for Kitchen Gardeners

Introduction

I hope my readers and their families are all fine who faced the storm Irma few days back in South and North America. These storms are inevitable in the current global climate change. Even science with today’s level of advancement cannot limit them in boundaries. So we are left with the only option of coping with these storms. Irma has spoiled millions of acres of land, damaging homes, kitchen gardens, parks, landscapes, infrastructures and wealth of people. However, it is the time to rebuild with a new spirit.

As a dirt lover, my concern is the rebuilding of the kitchen gardens that we have at our homes. Being a gardener, I am aware that the high speed winds, floods and salty rain water came with Irma has damaged not only the plants but also the soil. However, if we look at the bright side and think positively, there are few opportunities with the leftovers of Irma that can help us in re-building a prosperous urban garden again in our homes

Here in Pakistan, floods are frequent during the monsoon season (July-September) near the upper Indus Delta. As the flood goes downstream, the land is refilled with fertile soil and minerals that come along with the flood stream. In addition to this, re-shifting of the soil layer also bring positive results on plant health due to added beneficial micro-organisms. But in case of Irma, we have to deal with the water that is added with salts in it. So it is the time to take necessary steps for rebuilding of your urban garden.

First step in re-building of your kitchen garden is the planning to chalk out a pathway. The re-building plan should be categorized into three categories;

  1. Wash down everything
  2. Pruning the leftover plants and cleaning
  3. Recycling or Composting

Wash Down Everything

This is what you should immediately do after a storm. Rinse everything with water in the kitchen garden. This is necessary to remove excess salts came with storm sea water. More the salt stay on the leaves of plants, more it will harm your remaining plants. Even if the storm doesn’t bring sea water, washing everything in your urban garden help removing any harmful and decaying material.

Remove any mud or build of storm from the base of your plants and trees (If they are still left). Mostly trees survive in the storms. However, due to damage on their stem and leaves, there is fair chance that they get infected if you don’t wash them with water after the storm. This will also increase the chance of disease spread in your kitchen garden. Rinsing your plants with water will allow fast pace revival phase.

Some readers may think that adding more water to already saturated soil will damage the roots. But believe me; washing your kitchen garden is much needed after a storm. Removing the mud and other unwanted substances bought with the storm should be done immediately. In addition to this, the water will dilute any contaminants and weaken their power to infect soil and your plants.

Pruning the leftover plants and cleaning

Washing everything in your urban garden will allow you to see a clear picture of what is left in the garden. This will make the next step easy for you. You know what is gone, broken and left over. However, here I recommend waiting a day or two to see any sign of life in your plants. If new branches, leaves or flowers are emerging, give special care to them. Rest of the leaves, branches and stems should be pruned or if damages, they can be removed to allow fresh growth.

Similarly, large trees and shrubs should be given due importance while managing. If they are downed, remove them first. If you have no expertise, consider getting help by calling relevant government agency. This will help you getting security for your family.

Keep in mind to prune gently and less after storm. This is because, plants are already under stress, and pruning them a lot will damage their immunity to regrow. You can further prune in week or two as plant start getting stronger.

Recycling

In the last step of re-rehabilitating your kitchen garden, consider recycling the lost material from your urban garden. How? It is simple; the storms bring not only fertile soil but also rich organic matter. You can prepare your compost pile from the damaged leaves, stems and branches along with the mud came with storm. You can also add some quantity of storm water in your composting bin. The storm water is not drinkable and may contain sewage and industrial waste. This water is fit for accelerating your composting process inside a compost container.

Make Your Own Compost at Home for Urban Gardening. Here are Few Simple Steps

Storm Irma has gone. But that was not the last one. Every country on the globe faces these storms frequently in the changing climate. The need is the better coping and management strategies to minimize loss.

Kitchen garden for a gardener is just like his/her own kid and plants and veggies are darling. Caring them will bring satisfaction and healthy meals to your table.

Be safe, happy growing and eating 🙂

Cite this Article in APA Style as:

[box type=”note” align=”aligncenter” ]Rahman, M. A. (2017, September 12). Post-Storm Irma Tips for Kitchen Gardeners [Blog Post]. Retrieved from http://aridagriculture.com/2017/09/12/post-storm-irma-tips-for-kitchen-gardeners[/box]


Save

Save

Save

Save

Save

Save

Categories
Vegetable Gardening

5 Tips for Preparing Your Kitchen Garden for Winters

Introduction

In many countries of the world especially that are in Northern Hemisphere, the autumn season hits the ground as you turned your calendar to September 1st. The countries like United States, United Kingdom, Ireland, India, and Pakistan for example start witnessing autumn in September.The daylight gets shorter and night is cooler. Now for me, it is the time to start preparing kitchen garden for winters. In fact, it is the time for every dirt lover involved in urban gardening to start preparing garden for winters.

You are now aware that today’s article will be highlighting some tips to safeguard your kitchen garden from freezing winters to have a healthy and fresh soil for spring cultivation. Preparing kitchen garden for winters is necessary because, you may postpone or challenge winter for a while by covering the vegetables or herbs in urban garden with a sheet, but you cannot force your plants from going into hibernation or halt due to chilling temperature and declining light. Plus, it is a good time to start collecting the ripened veggies or fruits and start cleaning the soil of your kitchen garden.

If you have sown carrots, turnip, sugar beet, beet root, reddish, garlic or leeks, leave them inside the soil to harvest in early winters. But make sure of putting mark for identification and mulch on them to protect ground from thawing so that you can pull them out in snow.

Here are five tips that you should follow in urban gardening while preparing garden for winters.

1. Cleaning the Garden Beds

Cleaning should be prioritized at first while preparing kitchen garden for winters. A messy garden is common by the end of the growing season. Do not panic. Just divide your time by selecting one bed or a particular patch in kitchen garden daily. Make sure there are no rotting fruits or veggies left in the garden as several pests and light blight can overwinter on them. It is wise to put any leftover fruits or veggies in your composting bin. After cleaning, put an inch or 2 inch layer of compost and mulch on the soil beds. This will help soil from freezing completely.

Cleaning the Beds

2.Testing Your Soil  

By the end of the current season, your urban garden has feed you enough. Now it is time to check the health of soil. A good idea about soil health can be deduced by test of soil. Level of calcium, potassium, phosphorous, sulfur and magnesium can be estimated. Organic matter content and soil pH is also checked through a soil test. This test will also aid you in deciding about the amount of lime and fertilizer needed for your soil. Adding lime is always beneficial especially in winters, where it has sufficient time to mix with the soil and adjust soil pH.

Soil Test

3. Kitchen Garden Expansion  

This is my top advice to every dirt lover. Winter is the best time to expand your kitchen garden. You can do this in many ways. One of these is adding few new raised beds or even following the modern day urban gardening technique of adding square foot gardens above the grass. That is why, many online stores, nurseries and plant stores sell packed organic garden soil during the fall. You should add compost as you prepare your new patch of kitchen garden. In this manner, not only your goal of preparing kitchen garden for winters fulfill but you will also have access to healthy, fresh and expanded space for gardening in early spring.

Expanding Kitchen Garden

4. Collect Leaves

Winter season is truly a gold mine for kitchen gardeners and those who prepare their own compost. Collect leaves as much as you can. Put them in your composting bin. The fall brown leaves are rich in carbon thus are important in maintaining a good ratio of carbon-nitrogen in your compost bin. It is always best to hold these leaves with you if you are composting so that these can be added timely whenever nitrogen content of compost bin start accelerating. Another use of these leaves is to shred them and putting a layer of leaf mulch over the soil during winters. This will help in subdue weed growth, retaining of moisture and added nutrients as it decomposes in soil.

You Know Preparing Your Own Compost at Home is Easy? Find Our More Here

Composting the Fall Leaves

5. Tillage the Soil

Tillage of kitchen garden soil is the last step in preparing kitchen garden for winters. Why? The reason is simple. There are many pests and harmful insects preparing themselves to hibernate in your urban garden soil to overwinter. Till of soil exposes them and reduce their population. This allows you to have a peaceful farming during upcoming spring and summer season.

Soil Tillage

Happy Growing and Eating 🙂

Cite this Article in APA Style as:

[box type=”note” align=”aligncenter” ]Rahman, M. A. (2017, September 05). 5 Tips for Preparing Your Kitchen Garden for Winters [Blog Post]. Retrieved from http://aridagriculture.com/2017/07/23/5-tips-for-preparing-your-kitchen-garden-for-winters/[/box]

Save

Save

Save

Save

Save

Save

Save

Save

Save

Save

Categories
Vegetable Gardening

Preparing Compost for Kitchen Garden at Home: Beginners Guide

Introduction

Like your own health, the soil in your kitchen garden should also be healthy to perform gardening functions optimally. A continuous supply of nutrients is necessary so that vegetables, fruits or plants you have grown give you best production. Believe me; I have seen many blooming gardens turning into trash within not time. The reason is simple. You are harvesting the energy of the soil of your kitchen garden and not returning it back. This problem is common in urban gardening systems where the focus is to get more production from little space without refueling the soil to desire extent. To address this issue, today I am going to write on preparing compost for your kitchen garden at home. This article is a beginners guide for preparing compost at home. Before moving ahead, if you are planning of making compost of your own, start preparing now, as it will take at least one year to get it.

Starting Compost at Home

Now as you are all set to start making compost of your own, keep in mind these below bullet points;

  • Where to make compost?
  • Location
  • How to prepare compost?
  • Temperature Requirement for making compost.
  • Carbon-Nitrogen ratio
  • Precautions while preparing compost

Where to Make Compost?

The first and foremost element to address while planning to prepare compost is the selection of appropriate composting bin. Many online websites sell composting bins and barrels crafted specifically for urban gardening. They have a small inlet door where you can add composting input material.

Black Color Containers for Composting

I recommend every reader of mine to have a composting bin in his/her kitchen garden. Alternatively, you can also prepare your own traditional composting box made up of timber. This option also allows the freedom to customize the size of composting container as per your garden requirement.

Location

Location of placing the composting bin, barrel or container is important. It’s better to place it where people gathering are not frequent. This is due to the stink production as microbes start preparing compost for you. Then it is also important that your composting bin have sufficient access to sunlight.

Location of Compost Bin

The color of the composting bin is usually black. This is mainly to absorb more sunlight. In case you are using your home made timber composting bin, I recommend covering it with black tarp. This will work in the same manner.

Input Material for Making Compost

Being organic farming proponent, your kitchen garden soil should be fed with organic compost. And this is actually the goal of urban gardening to grow organic and eat fresh. So to get organic compost, the input should also be organic. There should be no chemical based or chemical added products in your compost input materials.

Input Material for Composting

For organic composting, you can add fruits and vegetables refuses, paper, small wooden sticks, newspapers, straws and grass clippings. Let me be clear, that newspaper may have chemicals in it, but its amount is negligible. If you are short of input material for making compost in kitchen garden, you can knock the door of your neighbors and ask them for their vegetable and fruit extras. If there are horses, sheep, goat or other livestock around your premises, feel free to add nutrient rich pack of manure in your composting bin.

Temperature Requirement for Making Compost

While preparing compost for you urban garden, temperature is the most critical factor to be looked at. Scientifically, a temperature between 140-160 Fahrenheit is best for composting. At this temperature, the microbes are mostly busy and effective in decaying process and making compost.

Maintain Optimum Temperature for Composting

However, if this range of temperature is not achievable in your kitchen garden environment, do not worry; microbes will still perform their duty as they also generate temperature of their own while decaying and composting. Just be sure that your composting bin is not in freezing temperature.

Carbon-Nitrogen Ratio

Like temperature, maintain carbon-nitrogen ratio while adding composting input materials. Any imbalance will affect the quality and later the performance of your compost in kitchen garden. A general rule is to maintain have 30:1 carbon-nitrogen ratio that is 30 parts of carbon and 1 part of nitrogen. Excess carbon will slow the decay process, while high nitrogen creates mess in the form of smell.

Carbon-Nitrogen Ratio in Compost

Now the next question here what are the best sources of Carbon and Nitrogen? As per my recommendation, for carbon, you must include following in your composting material;

  • Corn stalks
  • Card boards
  • Straws
  • Leaves
  • Ashes
  • Fruit shells of peanuts
  • Pine needles
  • Saw dust

On the other hand, fine sources of nitrogen are;

  • Vegetable scraps
  • Clover
  • Coffee grounds
  • Grass clippings
  • Garden waste
  • Hay
  • Manure
  • Seaweed
Ready Compost

Precautions while preparing compost

I hope your question how to prepare compost in kitchen garden at home has been addressed successfully. Below is the list of precautionary measures that should be given due consideration while preparing compost for urban gardening especially if you are a beginner in composting.

  • Stirring the decaying compost in the container is of great importance. Use garden fork for this purpose. At least do this exercise once a week. This allows good aeration to decaying compost and enhancement in composting process.
  • Black Color of composting container is important. As I mentioned earlier, use black tarp over your timber composting container for this purpose to absorb maximum sunlight.
  • Collect Liquid Compost In some purchased composting containers, there is an option that allows rain water to pass through inside the decaying material and collect at the bottom. In that case, collect that precious nutrient rich water and apply to your plants in kitchen garden.
  • Compost is Ready to Harvest for kitchen garden when it is decayed to a point that it appears like healthy and rich soil.
  • Apply your homemade compost to the plants which are at least 8-12 inches tall. Put an inch of compost around the stem and blend it in the soil.

Happy growing and eating 🙂

Facing Low Seed Germination Rate in Your Kitchen Garden? Here are Few Tips to Increase Seed Germination

Cite this Article in APA Style as:

[box type=”note” align=”aligncenter” ]Rahman, M. A. (2017, September 03). Preparing Compost for Kitchen Garden at Home: Beginners Guide [Blog Post]. Retrieved from http://aridagriculture.com/2017/09/03/preparing-compost-for-kitchen-garden-at-home-beginners-guide/[/box]

Save

Save

Save

Categories
Vegetable Gardening

How to Increase Seed Germination in your Kitchen Garden?

Introduction

As the world is witnessing increased urbanization, urban gardening is also getting common, new issues are arising daily related to kitchen or urban gardening, and people want solutions. This is because, kitchen gardening is different from open field practices. In open fields, the behavior of weather parameters is different and they impact the crops differently as compare to backyard gardens or urban garden systems.

Today I am going to write on a common question I am asked on my Facebook page (Arid Agriculture and Kitchen Gardening), through email and queries on my website that how to increase seed germination in kitchen garden? Germination of seed is a complex process. Even if you have top notch and branded store seeds, there are various other factors that hinder optimal germination. This includes the soil health (soil type, fertility, organic matter, pH, drainage etc.), the environmental conditions in your area, the farming practices you are following etc. These issues require a separate article to discuss in depth. The agenda of this article is to guide urban gardening lovers and amateurs with three simple and easy ways that will surely help them in achieving increased seed germination in kitchen garden.

You May Also Like Reading This : How to Grow Turmeric in Kitchen Garden?

How to Increase Seed Germination?

Soaking Seeds

First step in how to increase seed germination is the soaking the seeds before sowing. You can’t believe how a small duration of soaking the seeds in water can increase the germination rate of seeds. Soaking helps in softening the outer coating of the seed thus allowing easy germination. The water enters inside the seed, and elevates the process of germination after it is sown in the soil. Usually when you buy seeds, the information on it suggests soaking them in water. But how many of us follow that instruction? Even if it is not mentioned on the seed pack, water soaking is always beneficial. During winter season, soaked seeds harness more benefits. This is because, soaking seeds in water at room temperature (25oC-30oC) not only soften the coating but optimum temperature treatment is absorbed by the seed. So when you plant it in the soil even in the cold season, the germination rate improves. As far as soaking time is concerned, I recommend at-least two hours of soaking. However, an overnight soaking treatment will definitely increase seed germination in your kitchen garden.

Scarification

Next step in how to increase seed germination is scarification. When I am in a hurry to sow seeds in my kitchen garden, I use the process of scarification. It is a process to damage the outer coat of the seed so that the entry of water get easier that will eventually aid in increase seed germination. For scarification purpose, I use various tools including nail file, sand paper, a triangular file and nail clippers. There are few experts that support using hot water treatment or even acid treatment to the seeds but I am against these. Hot water treatment can cause permanent damage to the germinal hormones of the seeds while acid treatment is harmful for your skin. So my recommendation, do not use these.

Seed Scarification Tools

Now coming back to the tools I mentioned, they are pretty easy to use. For example, in case of sand paper, take two sand papers, and place the seeds between them. Rub the two sheets and your work is done. If there is large size seed, I use triangular file. For this, hold the file in one hand, and rub the seed on one edge. That’s it. Urban gardening is all about experimenting with new things, so you can use knife on your seeds especially the seeds that  are of medium size.

Manure or Compost Application

Being a big proponent of organic farming especially in kitchen gardens, I give a delight of farmyard manure or compost to my vegetable seeds at the time of sowing. If you are sowing in containers, pots or even in a plot of your kitchen garden, mixing manure or compost in the soil increase the germination rate of seeds. What I generally practice is, if I am sowing my vegetables in an open plot of my kitchen garden, I use trowel for plowing the plot and soften the soil. Then I mix the farmyard manure or compost in the soil and sow the vegetable seeds. The reason is that adding manure or compost increases the moisture carrying capacity of soil and makes it easier for the seeds to break their coat. As the coat breaks, they have ready-made nutrients available that help in speeding the germination process. Even the weak ones can show good germination due to nutrients availability.

Trowel for Plowing

There are many other methods of increasing the seed germination in urban gardening system. However the above three are easy to understand and application is swift. An integrated approach of using all three or any two above methods will bring great results. Hope this article has solved the problem of how to increase seed germination in your kitchen garden. If you have another query, write in comments below. Don’t forget to share this article for betterment of everyone.

Happy growing and Cheers 🙂

Cite this Article in APA Style as:

[box type=”note” align=”aligncenter” ]Rahman, M. A. (2017, August 23). How to Increase Seed Germination in your Kitchen Garden?[Blog Post]. Retrieved from http://aridagriculture.com/2017/08/23/how-to-increase-seed-germination-in-your-kitchen-garden/[/box]


Save

Save

Save

Save

Save

Categories
Vegetable Gardening

3 Most Healthy Vegetables to Grow in Your Kitchen Garden

Introduction

Freshly picked, home grown vegetables are the best source of rich and healthy nutrients; you can have anytime you want. It is always tough to choose what to grow in your kitchen or home garden. But today, i am going to solve this problem by writing on 3 most healthy vegetables that you should give a try in your kitchen garden. I hope this article will help every dirt lover in troubleshooting his/her most important concern. But first, let’s discuss why to choose healthiest vegetables when there are several other options available.

The reason of this article is that all vegetables don’t have equal benefits when you talk about your health. In fact, the element of health is pivotal in choosing what you grow in addition to fulfill your hobby. So it is always wise to grow most healthy vegetables.

Also Read: Kitchen Garden for Beginners

Now, internet is full of articles suggesting which crops are best to be grown in your garden. They give you a mammoth list to choose like top 10 or 20 veggies, however many of these fail to address the specific benefits of each vegetable they suggest. My list of 3 most healthy vegetables to grow in your garden covers these aspects so, that you have full confidence on what you are growing and eating. I always advice my readers, don’t stick in just cultivating your own garden, but also teach your neighbors and others about what you learn here and by your own way of cultivation. This is the best way to serve the community.

Now here is the list 3 most healthiest vegetables to grow in your garden.

1. Spinach

Popeye? Yes I know that’s what comes in your mind in first place. Definitely, spinach has something in it that we had watched Popeye eating spinach and getting balloons in his biceps and forearms. Though I am not preparing you to eat spinach and fight, but yes, spinach adds power to your immune system to fight foreign invaders in your body.

Spinach: 1st Best Veggie to Grow in your Kitchen Garden

Benefits: It provides basic nutrients to bones, hairs and skin. Spinach is also known for improving blood glucose, especially in diabetic patients, pull down the risk of cancer, control and optimize blood pressure and most importantly it aids in curtailing the risk of developing asthma.

What your body gets? 28 micro grams of Vitamin C from 100g serving. It fulfills 34 percent of your daily Vitamin C requirement. It also contains an antioxidant known as Alpha-Lipoic Acid, fibers, Vitamin A and Iron.

Also Read: Five Cheap DIY ways to Kill Home and Kitchen Garden Weeds

2. Broccoli

Sowing and watching these tiny trees growing in my kitchen garden is always a fun for me. However in my childhood, i remember of pushing my plate with Broccoli away from me. Since I learnt what these tiny veggies give to my body, I am using it at least thrice a week now.

Broccoli: 2nd Best Veggie to Grow in your Kitchen Garden

Benefits: Broccoli is a nutrient powerhouse that has lot of healthy calories. Obesity is a global phenomenon that is the root cause of many other diseases. Broccoli is on top of the list to fight obesity. Further, it is helpful against diabetes and heart diseases. Skin complexion is also improved because of certain amino acids present in it.

What your body gets? A cup full of broccoli provides your body with 43 milligrams of Calcium. In addition to this, it also adds 92 micro grams of Vitamin K, fulfilling your 100 percent daily requirement of it. Also it helps in improving digestion system and gives you fresh feeling.

3. Beet Roots

Apart from the delicious taste, it’s the color of the beets that always fascinated me since my childhood. I remember those days, when I used to go to the veggie store with mom and my first choice was always to pick green leafy reddish color beets in the shopping basket. As I grow older, and studied the advantages of eating this God’s gift, I made the routine to add it 3-4 days at least in my meals.

The most common way to use this veggie is in the salads. However, very few of you know that its greenish leaves are more nutritious than the beet root itself.  It is actually a great “two-fer” crop. Roots ad leaves are edible. Young green leaf can be added to the salad, while mature ones are perfect to sauté as a quick and delicious side meal. Red colored beet juice is equally popular in many parts of the world to reduce excess body fat.

Beet Root: 3rd Best Veggie to Grow in your Kitchen Garden

Benefits: The roots of the beets are high in potassium, iron and vitamin C. On the other hand, the greens are superior to roots in terms of nutritional value. These are rich and high in iron, Magnesium, Calcium, Zinc, Potassium, and Vitamins A, B6 and C.

What your body gets? One cup of raw beets (100 grams) delivers about 3 grams of dietary fiber and 60 calories. In addition to this, your body gets 0.01 and 0.06 grams of omega 3 and omega 6 fatty acids respectively. You also get 1.6 grams of protein and 6.8 grams of sugar.

Cite this Article in APA Style as:

[box type=”note” align=”aligncenter” ]Rahman, M. A. (2017, August 18). 3 Most Healthy Vegetables to Grow in Your Kitchen Garden [Blog Post]. Retrieved from http://aridagriculture.com/2017/08/18/vegetables-to-grow-in-kitchen-garden/[/box]


Save

Save