Categories
Vegetable Gardening

Ultimate Guide to Prepare a Winter Vegetable Garden

Introduction

As summer takes its final breaths, it’s time to pull ourselves together to prepare for a winter vegetable garden. With the arrival of cool morning breeze, this change in temperature directs us towards getting equip with all the resources needed for preparing a perfect fall vegetable garden. It is the time to welcome new seeds in your vegetable garden. Your autumn garden is all set to accept these new seeds to be sowed for winter vegetable garden.

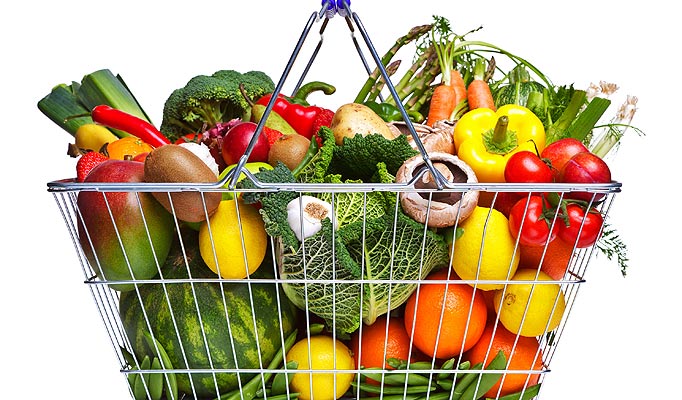
This article is dedicated to urban dirt lovers to guide them for preparing a perfect winter vegetable garden. This will ensure healthy supply of organic food as meals on their dining tables during cold day lunches, supper and dinner.  

There are certain steps that should be carried out in your winter vegetable garden while preparing to face cold breezes and to have your kitchen basket full of fresh veggies all the season.

Removal of Debris

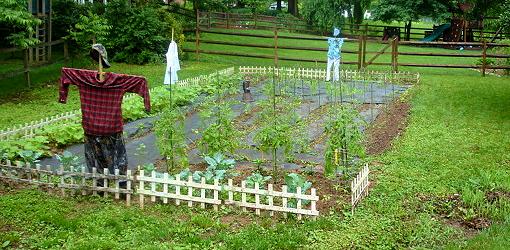
At the start of autumn garden should be treated as your child who needs to be pampered before the winter comes around. Autumn season is perfect to do all necessary actions to make your garden ready for winter crops.

In addition to this, autumn garden should be tackled in such a way that it strengthens the vegetable garden for the next two season viz., winter and summer.

So, first step to prepare for winter vegetable garden is to make sure that all the dead plants and other debris are removed and cleaned out from the soil. Any deceased plant left, can cause the spread of a disease. A dirty vegetable garden means unhealthy gardening. So start with cleaning the garden.

On the other hand, healthy left over’s of plants or plant debris should be mixed with the compost to make the soil healthy and nutritious. Adding them into the crops of vegetable garden optimize the drainage, expose oxygen, release compaction and enriches the soil.

Adding Strength to the Soil of Winter Vegetable Garden

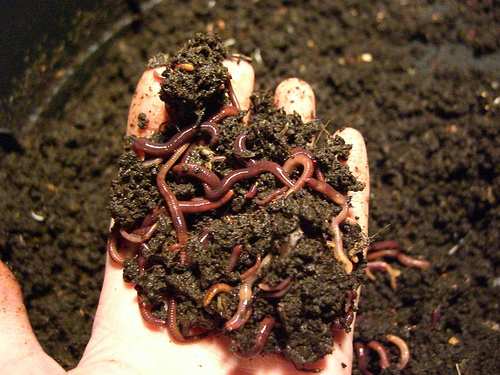
In my opinion, using chemicals in your soil during preparations of winter vegetable garden will be quite harmful especially when there is another way out. The soil can be enhanced and enriched by adding compost (homemade compost or commercial compost), vermicompost, compost tea, cover crops and animals manure. In case of animal manure, animals should also be fed with the organic feed. This will be less expensive and completely natural.

It should be kept in mind that, your vegetable garden is exhausted producing all those crops during spring and summer, spending so much energy and nutrition.

Amongst the wide range of options available for adding strength to the soil, fall is the season to flourish your fall vegetable garden and make it healthy and refresh all over again.

On the other hand, winter rains carry lots of nutrition which get buried deep underground in the soil. So I suggest tilling vegetable garden soil as it is important if you want to avoid surface run off.

Continue to Next Page Arid | Agriculture | Vegetable Gardening

Categories
Vegetable Gardening

How to Dry the Herbs At Home?

Introduction

Drying the herbs at home to use them as spices in food dishes is an old tradition. However, in the today’s fast pace life, many consider it a hard and time consuming effort. However, home grown dry herbs add more flavor and confidence to your dishes than the herbs you purchase from big stores and markets. In fact, best herbs are those that are grown under your own supervision plus cultivating own herbs at home are is easy and inexpensive. This article will guide you through three easy steps for obtaining dry herbs at home to fill your kitchen spices jar.

Easy and best herbs to grow at home are Tarragon, Bay, Mint, Lemon balm, Lavender, Rosemary and Thyme. This is because these are best air drying herbs as compare to high moisture containing herbs. After drying, the spices of these herbs allow you to enjoy summer flavor all year.

Before Drying the Herbs

As you are drying the herbs to make spices, so before drying, it is vitally important to harvest healthy branches. Harvesting should be done at the right time. Best time to harvest the herbs is before the flower development. Discarding of any damaged leaves is recommended to have best quality dry herbs. I would suggest harvesting on a warm and dry day around mid-day after the morning dew has evaporated.

Let us now just jump right in to discuss the procedure of drying herbs in a step by step and uncomplicated method.

Procedure to Make Spices from Best Herbs

Effective drying of the herbs relies greatly on abundant dry and fresh air rather than on heat or through any heating medium. Idyllic scenario demands for a well-ventilated place out of direct sunlight. If the atmosphere is humid, then the process of drying will be much slower and could result in mold infestation. In that case, i would suggest using a small commercial dehydrator for drying the herbs.  

Step 1: Harvesting and Cleaning the Herbs

Once the harvesting is done, make sure to remove any insects or soil by shaking off the herb stem. If necessary, rinse it with cool water. Then pat dry with paper towels and provide plenty of air circulation for quick drying of water.

Step 2: Clubbing the Stems to Dry Herbs

After cleaning stems of the herbs, remove lower leaves from the stem and then cluster 4-6 stems together for tying them as a bunch. I would suggest using a rubber band here instead of thread. This is because, as the bundle of stems will shrink while drying, it will cause loosening of the thread and eventually the herbs will fall. It is best to periodically check the bundle that it’s not slipping.

Continue to Step 3 Arid | Agriculture | Vegetable Gardening

Categories
Vegetable Gardening

5 Reasons of crop Failure in Vegetable Garden

Introduction

Vegetable gardening is simple and easy, and can yield successful crops year round. However, vegetable gardening can become quite complicated, especially for beginners, if the required steps are not followed. Besides, it can be challenging at times even for expert gardeners and therefore the produce doesn’t give anticipated results. To make things easy and smooth, I am taking this opportunity to discuss the five most common crop failures that occur in the modern day urban gardening system and how to turn around those failures into successes of growing crops at your home.

1 Seeds Fail to Germinate

It’s heartbreaking when you did everything according to plan and yet the seeds fail to germinate. This is one of the most common vegetable garden failures. Failure in germination of seeds is caused by old seeds, washed away seeds, lack of moisture, extremes of temperature, improper planting depth or seeds being stolen by animals.

It’s vital to plant crops that are suitable for a giving season and climatic conditions. Like for example:  growing tomatoes, when there’s less than 4 hours of sunlight available, planting carrots in clay soils and warm temperatures or growing cabbage in Mediterranean climates, as they are prone to pest infestation.

2 Spindly Plant Seedlings

Young plant seedlings become leggy, when they are growing in an overcrowded container or pot. Needless to say, this occurs because the growing nutrient hungry plants compete for organic nutrients, adequate sunlight. Furthermore, root damage caused by disease or transplanting also result in spindly seedlings.

3 Low Yields

Low yields of crops in vegetable gardening usually results from insufficient watering and using wrong type of fertilizer for a particular type of crop. For example, tomatoes and peppers require high potassium and leafy plants like cabbage grow well in high nitrogen containing soil. Due to overcrowding of plants they compete for nutrients. I would suggest doing soil tests and then add nutrients accordingly to the needs of the crop.

Continue to Next PageArid | Agriculture | Vegetable Gardening

Categories
Agriculture Corner

Principles of Agricultural Extension

Introduction

Principles in any field of knowledge provide the foundation stone of laws and manners of carrying out research and development activities in a systematic way to achieve the desired goals and objectives. In agricultural extension, there are also certain principles on which the subject matter is based on. These principles guide the agricultural extension officer and service provider to work in an organized way to ensure smooth flow of agricultural extension service at the door step of farmers. By following these principles, the importance of agricultural extension increases many folds. The principles are;

1 Individuals are at Core of a Society

It is a fact that individuals are the building block of an economy and nation. An individual is a part of a group. Different groups work and interact together to make a society and as a result a nation is built. So the significance of an individual cannot be denied.

By keeping this in mind, the first principle of agriculture extension is to recognize the importance of each farmer in a community or village and he should be contacted individually. Every farmer has different problem and require peculiar solution to the problem. The agricultural extension officer has to contact the farmers individually instead of meeting them in groups. Though gatherings are required in certain activities, but contacting individual farmers is proved beneficial in prospering agriculture sector.

2 Providing Education

Being a human being, education is a basic right of every individual. On the other hand, the rural citizens (mostly farmers) have exploring nature and they are always ready to get new information related to their farming activity.

For an area, agricultural extension service should be designed in such a manner that it caters the needs of small as well as large farmers in a village. Agricultural extension officer should be equipped with modern and innovative knowledge so that they can transfer this knowledge to the farming community well on time. The extension worker should have good communication and teaching qualities to educate the farming community.

Continue to Next PageArid | Agriculture | Vegetable Gardening

Categories
Vegetable Gardening

4 Natural Bug Repellents in Gardening

Introduction

The most important thing I have learnt from my 10 years gardening experience so far is the controlling of weeds and bugs in the garden whether it is vegetable garden or flowering garden. I have covered the control of weeds in one of my previous articles. Another query I receive a lot from my readers is regarding what are natural bug repellents in the gardening niche?

Also Read : Five Cheap DIY ways to Kill Home and Kitchen Garden Weeds

In pest control domain, bugs are the mega-annoying creatures that not only hurt darling plants and your feelings, but also their presence in any part of your home is irritating. There are many bug repellents available in the market, but being proponent of organic control of weeds and bugs, I prefer to control bugs through natural bug repellents.

If you are dealing with bugs in the garden, then top notch strategy is to use those plants that have property of being natural bug repellents. This article will discuss 4 natural bug repellents for dirt lovers. Even if you have pest control in mind, that is, controlling bugs in any other part of home, the below list of 4 natural bug repellent plants will be equally beneficial.

1 Basil

In a vegetable garden, utilizing crisp basil as natural bug repellent is a good strategy. To make a creepy crawly repellent shower,  basic formula calls for pouring 4 ounces of bubbling water into a compartment holding 4 to 6 ounces of perfect, new basil leaves (stems can be connected). Giving leaves a chance to soak for a few hours, expelling the leaves and pressing the majority of the leaves’ dampness into the blend will make the solution stronger.

At that point altogether blend 4 ounces of (shoddy!) vodka with the basil-water blend. Store in the icebox and apply as a shower while going outside. Make certain to keep the shower far from your eyes, nose and mouth.

Continue to Next Page Arid | Agriculture | Vegetable Gardening

Categories
Agriculture Corner

Concept of Education in Agriculture Extension

Introduction

Agriculture sector is the backbone of economy for many nations especially in the third world. In addition to this, the sector is also the sole responsible for ensuring food security globally. So the importance of agriculture is of core importance for developed as well as for underdeveloped nations.

As we all know, agriculture has several branches or agencies in which it is divided. One of these is the Agriculture Extension. The department of agriculture extension has the pivotal role in the development of agriculture sector as a whole.

Agriculture extension office is not only responsible for dissemination of technology and innovation to the farmers, but also aids in providing solutions to the problems of farming community.  Agriculture extension services provided are basically act as bridge of communication between the scientists and farmers. Thus to ensure advancement in agriculture sector of any country, department of agriculture extension needs to be updated regularly.

Education and Agriculture Extension

Agriculture extension is basically educating the farming community. So basically, it uses the principle of education to teach farmers about farming techniques. Farmers are just like students in this system and making them learn is the objective. So it is important to look at what is the concept of education in agriculture extension.

As we all know, education is sum of all activities and procedures that are carried out to bring the desirable changes and mold human behavior according to the need. The education is divided into three categories according to the environment in which it is provided. These three categories are;

  1. Formal education
  2. Non-formal education
  3. Informal education

In agriculture extension, these types of education are either provided by department of agriculture extension in universities or training institutes or by agriculture extension office in the respective districts. However the aim of both is to provide state of the art and modern agriculture extension services to their farming community for prosperous agriculture sector.

Let us study a brief about all three types of education system to get deep insight about the topic.

1 Formal Education

As the name portrays what could be the meaning of formal education in agriculture extension? In this type of education, a well-structured system of education exits, provided in the teaching institutes and universities by the department of agriculture extension. This type of education is provided within the four walls of teaching institute.

Characteristics: The characteristics of formal education include a proper dress code, attendance system for the learners, examination at the end of a session, students are provided with degrees and diplomas, homogeneous audience (age), prescribed syllabus, and usually one way flow of knowledge.

Continue to Next PageArid | Agriculture | Agriculture Extension

Categories
Vegetable Gardening

How to Grow Cherries from Seed

Introduction

For all those cherry lovers out there, growing cherries from seed or to be more exact growing cherries from pits seems surreal and fascinating at the same time, when you can enjoy delicious home grown backyard cherries.

How to grow cherries from seed seems a difficult task for most and for those, where crop fails to produce fruit in the initial attempt. This crushes all their confidence and excitement to procure this hobby in the first place.

Those who have even a slightest bit of interest of growing cherries from seed at home, from where they can consume fresh, luscious and succulent fruits instead of having store-bought produce that lacks essential nutrients and can’t beat fresh home grown cherries, then follow these 7 steps precisely.

At the end of this article, you will learn that growing cherries from pits is a piece of cake, plus it will fulfill your lust of satisfying your gardening hobby.

Step 1: Getting the Cherry Seed from Fruit

To answer how to grow cherries from seed question, let’s begin with the very first step of obtaining the cherry seeds.  Remove the pit from the fruit and clean off any of the remaining flesh or pulp. Just keep in mind of not removing the hard shell that surrounds the pit or seed. If the shell is broken, the dream of growing cherries from seed will die at that very moment.

Step 2: Chilling Treatment

Those who are new to growing cherries, it is to be noted that cherries require chilling treatment before germination. So to mimic an artificial cold season environment, next step is applying chilling treatment to cherry pits. This can be done by placing the pits in a plastic bag.

Fill this bag with damp paper towels and then store the bag in refrigerator for at least 10 weeks. Adding moist vermiculture in the bag will add strength to the cherry seeds. The damp towels allow the pits not to dry out and make sure to keep a regular check of moisture level inside the bag.

Step 3: Removing Pits from Refrigerator

After the time frame of 10 weeks have passed, remove the pits from the plastic bag and allow them to come to room temperature subsequently making the pits ready to be planted in soil. However, its ideal to plant your cherries in the late fall or early summer season as the soil contains higher moisture content.

Continue to Next Page Arid | Agriculture | How to grow

Categories
Agriculture Corner

Horticultural Classification of Vegetables in Agriculture (Part 2)

Introduction

In part 1 of Horticultural Classification of Vegetables in Agriculture, it was presented that, vegetables are classified into 4 groups. This classification is based on a set criterion to understand, study and deal with each vegetable according to its peculiar requirements. The four classes were;

  1. Botanical features
  2. Life cycle
  3. Adaptation
  4. Edible and Economic Part

This article will now discuss about the last two classes of vegetables based on Adaptation and Edible or Economic Part criteria. Like in the previous part, each class has sub-classes, and at the end of each sub-class, you will find suitable examples of vegetables belong to each sub-class.

Also Read: Horticultural Classification of Vegetables in Agriculture (Part 1)

Vegetable Classification Based on Adaptation Features

In agriculture, vegetables are also classified on the basis of the pattern of their adaptation. This means, vegetables can be grouped on the basis of their preferred temperature in which they grow optimally. More precisely, certain vegetables like cool temperature to grow while, some grow best in warm temperature. So, based on the season, vegetables are further sub-classed into Cool Season Vegetables and Warm Season Vegetables.

Cool Season Vegetables: Vegetables that require low temperature to grow are known as Cool Season Vegetables. The monthly temperature requirement ranges between 60oF to 65oF (15oC to 18oC). The temperature factor is important because in case of high temperature, it increases bolting or premature flowers which results in bitter taste vegetables especially in Cilantro and Lettuce. Arugula, Carrots, Broccoli, Beets, Brussels sprouts, Cabbage and Collards are well known examples of Cool Season Vegetables.

Warm Season Vegetables: Vegetables that require high temperature to grow are known as Warm Season Vegetables. Generally, these vegetables are grown during summer season. The monthly temperature requirement ranges between 65oF to 81oF (18oC to 27oC). Besides high temperature, Warm Season Vegetables also require warm soil to have proper growth and fruiting. The Warm Season Vegetables are killed with the onset of frost during winter season. Suitable examples of these vegetables include Okra, Pumpkins, Peppers, Zucchini, Basil, Eggplant, Edamame, Cucumber and Corn.

Continue to Next Page Arid | Agriculture

Categories
Agriculture Corner

Horticultural Classification of Vegetables in Agriculture (Part 1)

Introduction

In agriculture sciences, there exists a proper system of classification for vegetables. The reason is to understand, study and deal with each vegetable according to its peculiar requirements. This article will discuss the horticultural classification of vegetables in agriculture.

In general, vegetable are classified into 4 classes based on;

  1. Botanical features
  2. Life cycle
  3. Adaptation
  4. Edible or Economic Part

Vegetable Classification Based on Botanical Features

In this class, vegetables are grouped together in such a way that exhibits common features and characteristics. Based on botanical features, vegetables are further divided into 3 sub-classes.

Solanaceous Vegetables or Solanaceous Plants: Solanaceous vegetables belong to the major group known as Angiosperms while they are related to the family Solanaceae. The word Solanaceae is derived from the genus Solanum which means “the nightshade plants’. Solanaceous vegetables include Tomato, Solanum, Egg Plant, Okra, Goji Berries, Sorrel etc.

Vine Vegetables or Vines: Vine vegetables have peculiar characteristics of a stem system that needs support to climb. If physical support is not available, then the Vine vegetables start to grow on the ground. In agriculture, Vine vegetables are also known as ‘climbing vegetables’. Interestingly, if no support is provided to stems, and other plants are present nearby, they start to crawl on these plants. Well known examples of Vine vegetables are Cucumber, Pumpkin, Summer Squash, Tomatoes, Beans etc.

Cole Vegetables or Cole Crops: In agriculture, the vegetables that belong to the mustard family are referred to as Cole crops. They are also termed as Cruciferous vegetables. Examples of Cole Vegetables include Brussels sprouts, Kale, cabbage, cauliflower, Kohlrabi etc.

Continue to Next PageArid | Agriculture

Categories
Vegetable Gardening

How to do Worm Farming for Vegetable Garden?

Introduction

Technically, worm farming is called as vermiculture or vermicomposting. It is a tremendous way to minimize food waste generated in your kitchen. This kitchen waste, which is organic in nature, is the source of food for the worms present in the soil. The organic waste is used by the worms as food. They decompose it into nutrient rich material. As this decomposing is carried out in the soil, the nutritious material made by the worms is readily available for the plant growth in your vegetable garden.

How Worm Farming is Beneficial?

Worm farming or Vermicompost plays a vital role in improving soil texture, structure and aeration. It also adds strength to the soil in terms of increasing water-holding capacity of the soil. The vegetables you grow will develop a deep and strong root system that is beneficial to fight diseases and sustain under harsh conditions.

The output of worms which is also called as wormpoop or worm castings is perfect to generate top soil in vegetable gardening. On the other hand, the fluid produced in the process of vermicomposting is used as fertilizer. The excess fluid can be stored in a bottle for later use.  Similarly, vermicomposting also adds valuable microorganisms to the soil. The advantage of these microorganisms is that they, along with the soil fauna, aid in breaking organic materials and convert nutrients into a more readily available food form for the plants

Another benefit of worm farming is that, you can use your organic kitchen waste in vermiculture instead of going to throw or landfill it.

Continue to Next Page